Quick Start
This guide gets a new FLXBL project connected from your terminal. You will install the CLI, authenticate, inspect your tenant context, design a schema, generate a typed client, and create/query data.
Prerequisites
- A FLXBL account and tenant.
- Access to your tenant through
flxbl login; API keys are only needed for non-interactive workflows. - Node.js 18 or newer.
Step 1: Install The CLI
Install the CLI in your app repository when you use code generation. A global install is useful for quick local exploration.
# Recommended for app projects
npm install -D @flxbl-dev/cli

# Or install globally
npm install -g @flxbl-dev/cliStep 2: Authenticate
Use flxbl login for the easiest local setup. It opens
browser-based authentication through FLXBL Platform at
https://platform.flxbl.dev
and stores a token locally. Use environment variables and API keys for CI,
scripts, and headless coding agents so credentials do not get written into source files.
# Easiest local auth: opens browser-based login through FLXBL Platform
flxbl login

# Use a specific API instance when needed
flxbl login --instance https://api.flxbl.dev

# Non-interactive auth for CI and agents
export FLXBL_INSTANCE_URL="https://api.flxbl.dev"
export FLXBL_API_KEY="flxbl_your_api_key"

flxbl doctor
flxbl whoami --jsonStep 3: Load Context
The context command returns the tenant, active schema, available commands, and optionally generated API endpoints. Agents should load this once near the beginning of a work session instead of guessing entity names.
# Compact tenant/schema/command snapshot
flxbl context --json

# Include API endpoints and identity configuration
flxbl context --full --json

# Inspect only the active schema
flxbl context --section schema --jsonStep 4: Design Your Schema
Use the visual Schema Editor in the dashboard to create entities, add typed fields, and connect relationships. FLXBL tracks schema versions and handles migrations for published changes.
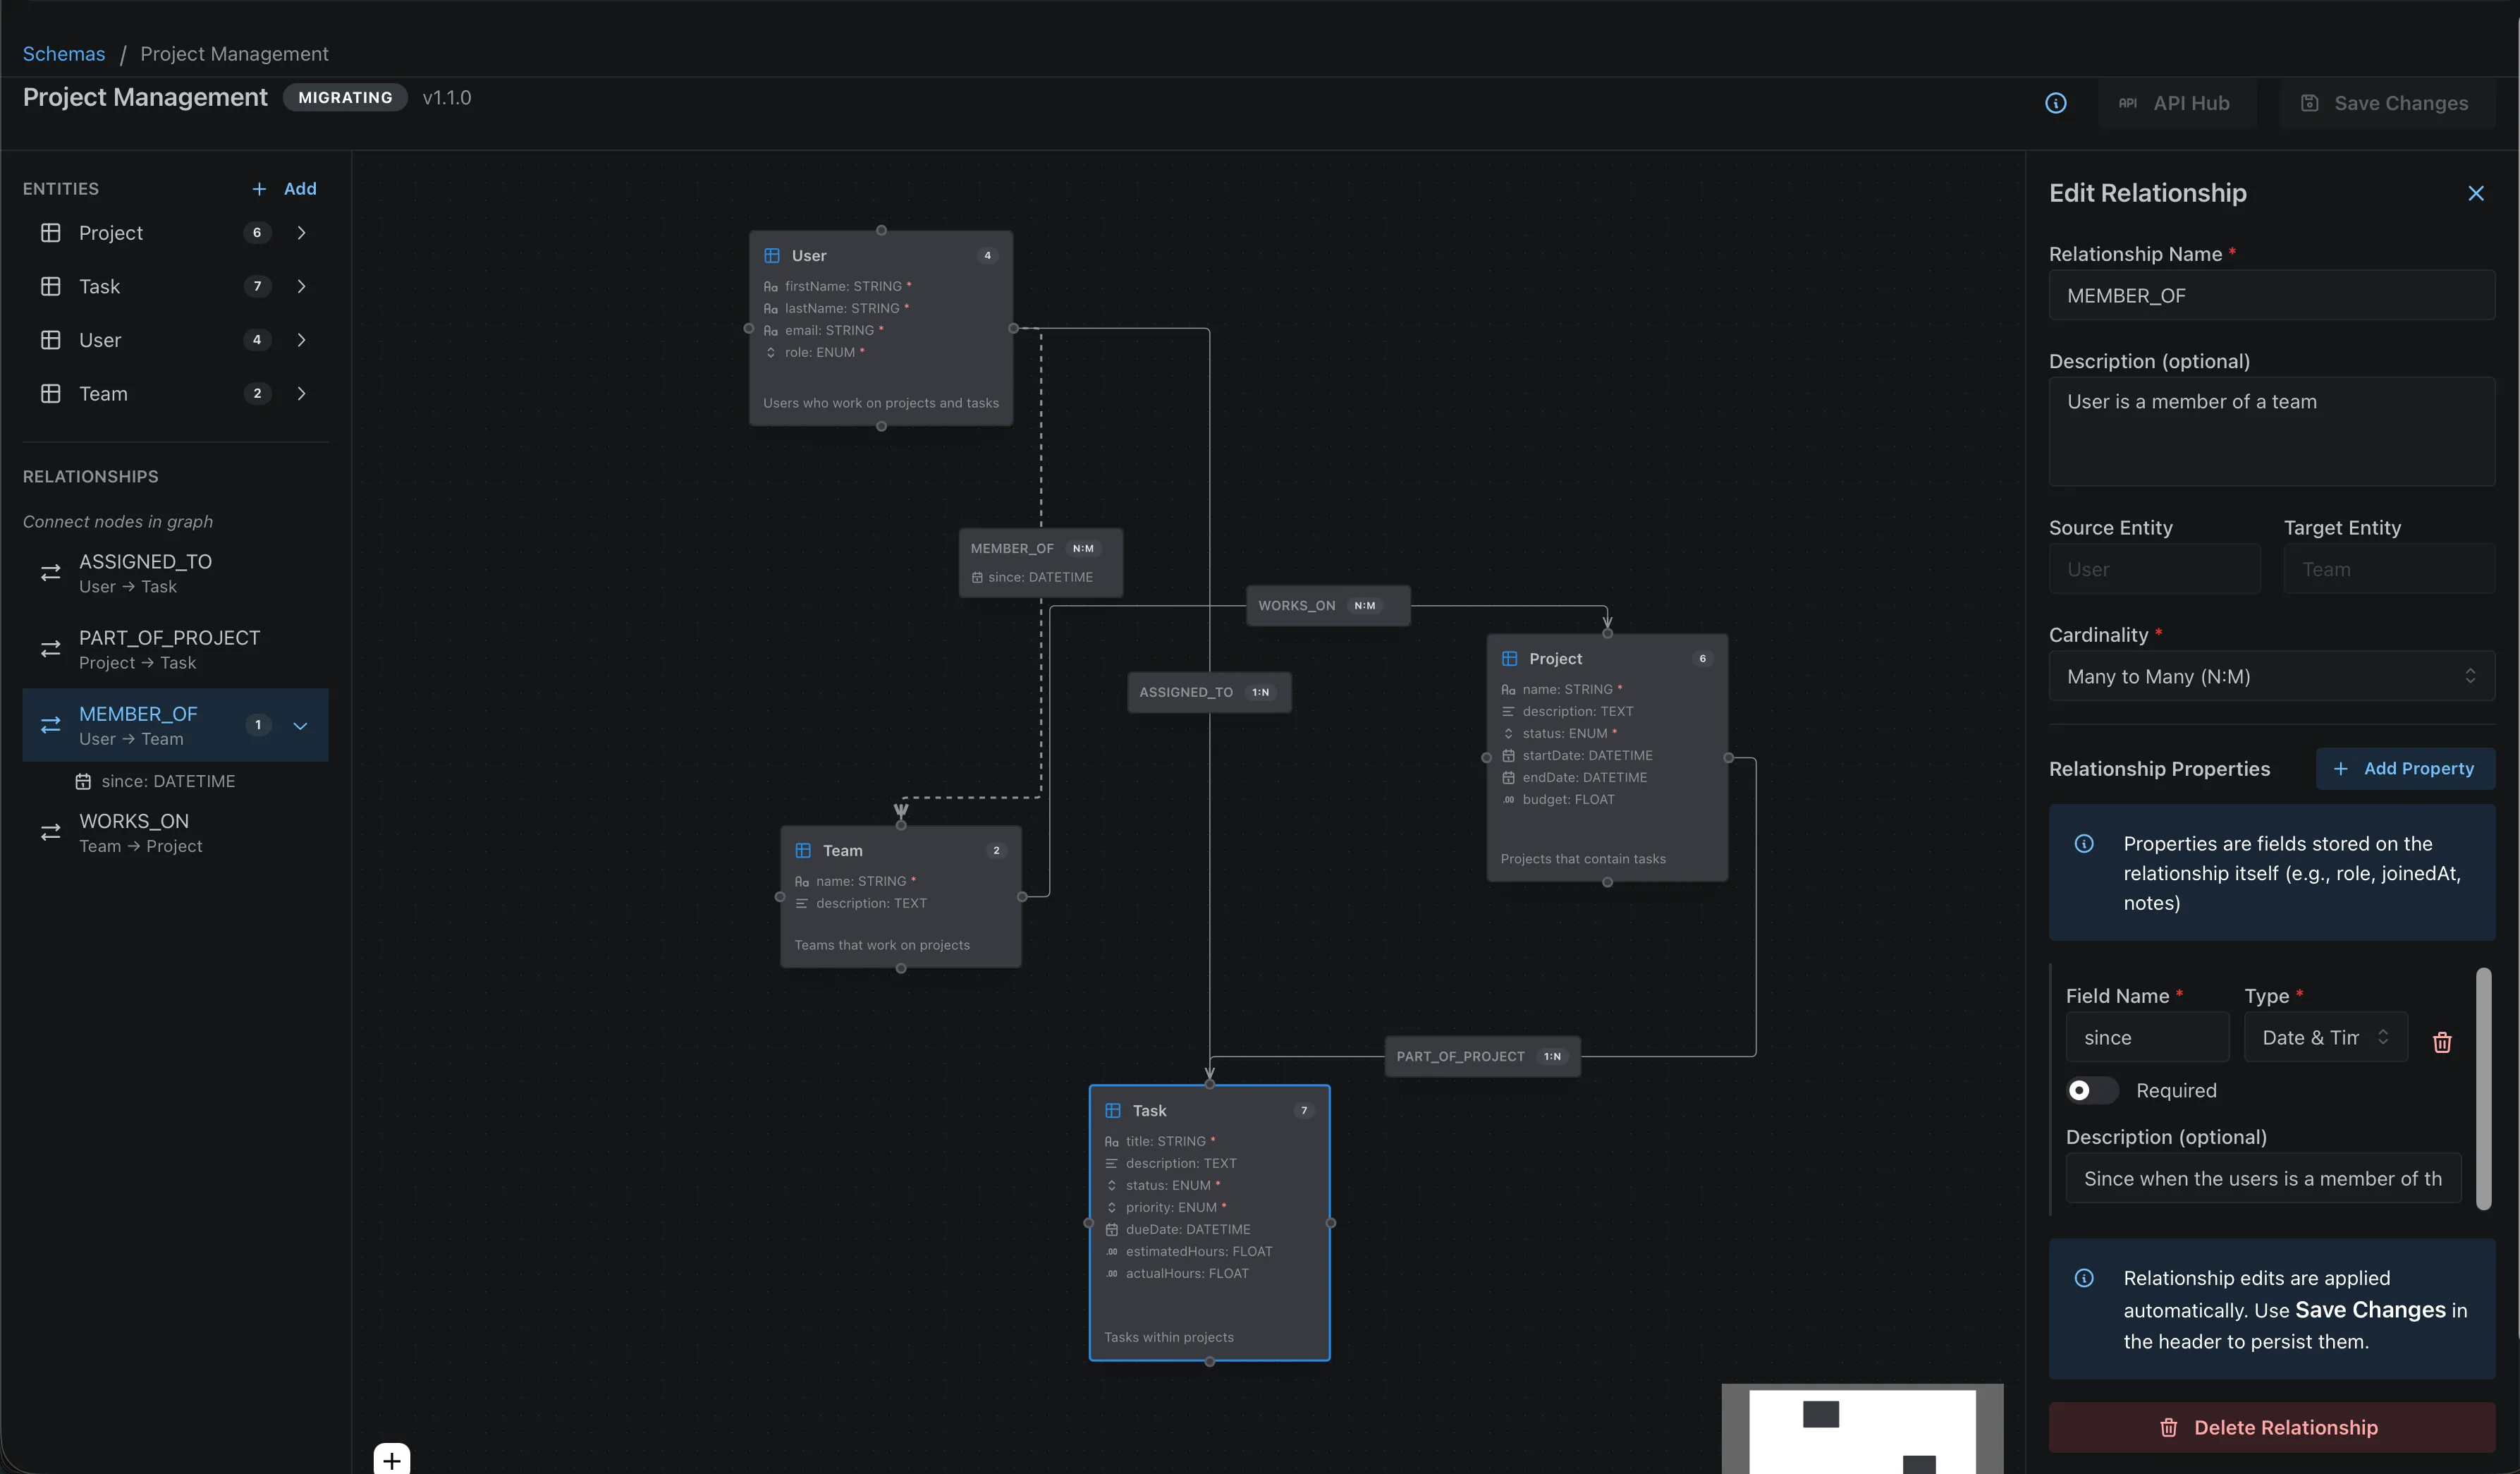
From the terminal, inspect the active schema with
flxbl schema show --json, validate local schema files with
flxbl schema validate, and compare versions with
flxbl schema diff.
Step 5: Generate A Typed Client
Generate TypeScript types, query helpers, relationship helpers, and a typed client from the active schema.
# Create flxbl.config.ts
flxbl init

# Generate typed SDK files from your active schema
flxbl generate

# Generate Zod schemas as well as TypeScript types
flxbl generate --format zodStep 6: Create And Query Data
Use the CLI for inspection, scripts, and agent workflows. Use the generated SDK or generated REST/GraphQL APIs from application code.
# Create a product
echo '{
  "name": "Wireless Headphones",
  "description": "Premium noise-canceling headphones",
  "price": 299.99,
  "inStock": true
}' | flxbl entity create Product --stdin --json

# Query products with filters and selected fields
flxbl entity list Product \
  --where '{"inStock":true}' \
  --search "wireless" \
  --fields id,name,price \
  --limit 10 \
--jsonUse The Generated SDK
import { createFlxblClient } from './flxbl/_generated';

const db = createFlxblClient({
  instanceUrl: 'https://api.flxbl.dev',
  apiKey: process.env.FLXBL_API_KEY,
});

const result = await db.products.findMany({
  where: { inStock: { $eq: true } },
  search: 'wireless',
  select: ['id', 'name', 'price'],
  limit: 10,
});

console.log(result.items);Or Call The REST API Directly
curl -X POST https://api.flxbl.dev/api/v1/dynamic/Product/query \
  -H "Authorization: Bearer flxbl_your_api_key" \
  -H "Content-Type: application/json" \
  -d '{
    "where": {
      "price": { "$lte": 500 },
      "inStock": { "$eq": true }
    },
    "orderBy": "price",
    "orderDirection": "ASC",
    "limit": 10
}'Next Steps
- FLXBL CLI - full command reference.
- LLM-Friendly CLI - agent-safe shell workflows.
- Schema Design - field types, relationships, identities, and vectors.
- TypeScript SDK - generated client usage.
- Query DSL - filters, pagination, and graph traversal.